In week 1 we were asked to create a crate while following our tutors instructions, we first created a box object using the cube geometry, then we pushed in the faces on the sides in a bit, we were then asked to add slats to the sides.
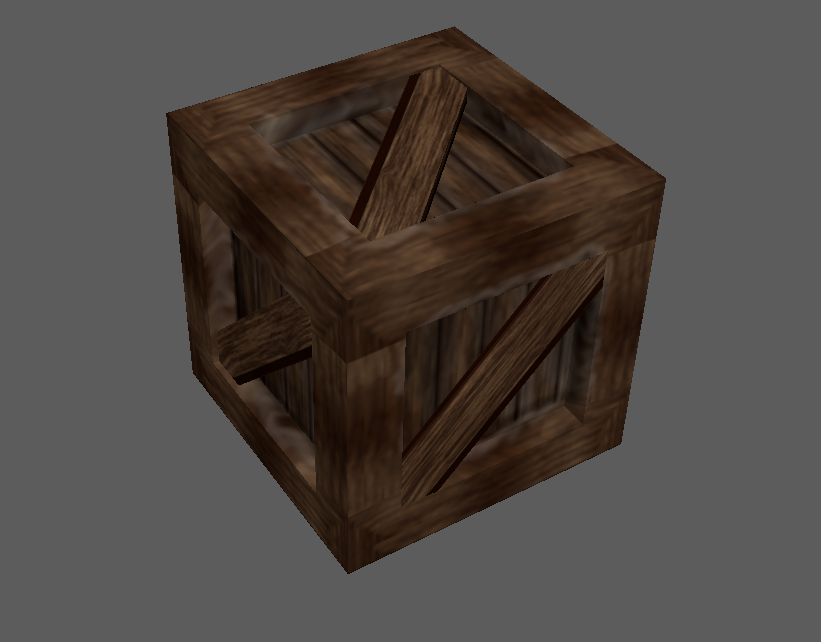
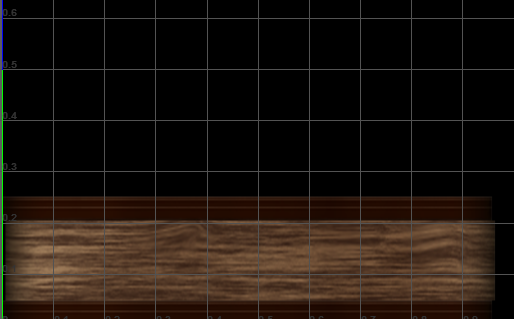
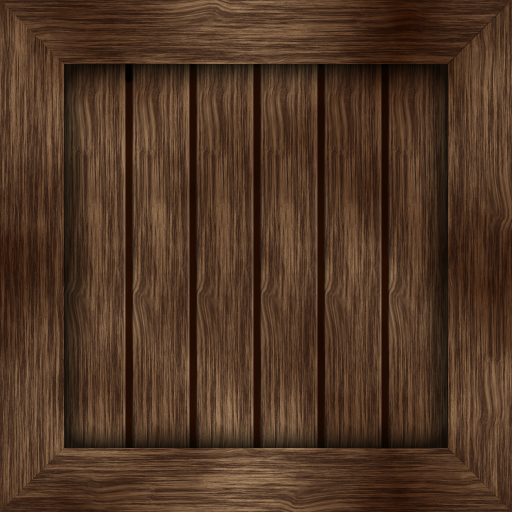
In week 2 we continued to work on the crate unwrapping the UVs to get ready for texturing the crate and the slates, we then started to add the textures on to the UVs in Photoshop.
In week 4 we started to work on hand painted textures, we started by creating a wood texture, first we made the screen grey to make the texture have shade to it we then made the outlines of the wooden texture, we were then asked to create a stone texture using black and white to create the highlights of the stone, the highlights were there to add depth.
In week 5 we had continued on with our hand painted textures we applied different details to our textures then we were asked to add multiple colours to the stones using the offset brush tool to create an effect without loosing the detail we added.
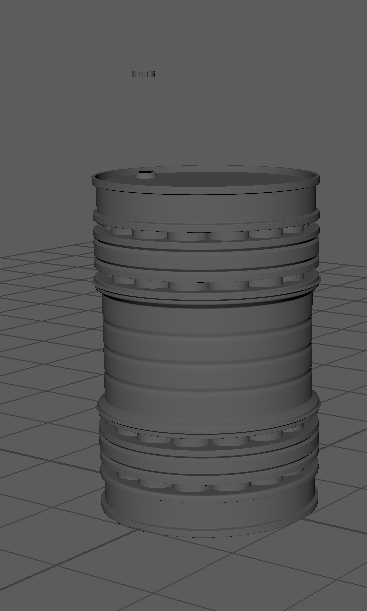
In week 6 we started working on a high poly oil drum, we first started by getting a cylinder primitive, we took this primative and then highlight the top and bottom faces and then used the bevel tool and set the settings to (Fraction-0.3, segments-2 and chamfer-off), after this we then highlighted the new vertices that were created then we used the scale tool and scaled them in to make a in dip in the oil drum the is to give the oil drum a lip, after this we then got another cylinder and scaled it to fit the indents at the middle top and bottom, after this we used Ctrl + D to clone the cylinder and then used the top view perspective to place it close to the surrounding edges, after this we then pressed shift + D which then cloned the object and the rotation that was set before, we then did the same for the bottom, the next step to shrink down another cylinder to fit round the middle of the cylinders we just placed after that we cloned the new cylinder and placed it on the bottom cylinders, and then we added slight indents around them using the bevel tool used earlier, after this we then started to create the lid of the oil drum first we selected the vertices selection tool then we used the bevel tool again to create more edges around the lid after that we used the scale tool to slightly move the edges away then the move tool to move them down to create the lid of the oil drum, then after this we started to make the spout of the oil drum we did this by getting another cylinder and scaling it down after that we then used the boolean tool (by first selecting the cylinder we just made then the oil drum) this then made a hole in the oil drum we then had to make sure that the lines met up we did this by selecting them and using the target weld tool to weld the 2 vertices together, after this we created a slight indent like we did at the top for the bottom.
In week 7 we continued to tidy up our high poly barrels we did this by tweaking the spout to make it a little smaller, to do this we first selected the spots surrounding edges around the spout then using the scale tool we brought the edges closer to create a lip effect in the spout, after this we then stared to create a lid, to do this we first got another cylinder and scaled it down to the correct size of the spout we then did the same indents as last week for the oil drum onto the lid, after this we got another cylinder, then we chose every other line and did this around the cylinder to give the lid a screw effect we then cloned this and rotated it so that it fitted next to it to make it look more like a screw top lid after this we placed it into the lid.
In week 9 we unwrapped our UV’s to get it ready for substance painter, we did this by making sure we give everything an appropriate name so we can easily tell whats the low poly and the high poly after that we then went onto substance painted and applied the bake of the high poly onto the low poly.

In week 10 we had explored more features in substance painter going through all the different UI capability’s and how to get the oil drum to show up in the software along with the high poly oil drum, this is so we can bake the detail in, after this we then had to add an ambient occlusion to the oil drum to add depth and shadow to the indents, after this we then added the rough steel texture to allow for it to look like a rusty barrel, after this we then changed the barrels colour using the fill tool, we then had to scrape a little bit of the paint off the barrel to make it look rusted.
